Automatic Repair Loop for windows 10
Day by day windows is becoming more stable and we have reached the windows 10 now. It is designed with its own repair tool but sometimes it fails to solve your problems.
Automatic Repair is a feature designed to help you fix your PC issues in Windows. The windows show different problems when we forcefully shut down your system while certain program is running and when then is not producing enough potential. So to fix all such problems you need Automatic Repair Loop. There are some ways to get rid of this problem.
1.First, restart your device and press F8 until Window Boot Manager is not pointed. Here you can start the window normally. As the Window starts, you can go to the System Protection inside the system restore. This allows the disk to be protected and get back up for the same.
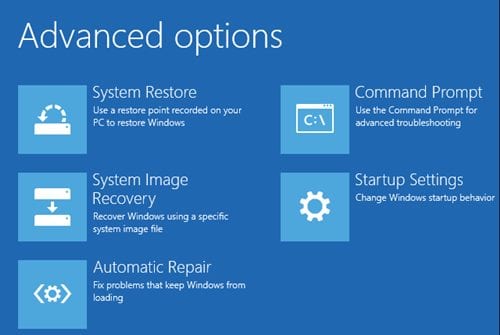
2.After the computer gets a restart, a Boot menu appears after which you have to follow following steps: Troubleshoot>Advanced Options> System Restore. Before getting any issue in your system if you are able to create the restore point then restoring of your windows will be easy.

3.Another way is to use the Comand Prompt as below:
. Troubleshoot > Advanced Options.> Command Prompt
.After this, enter the following line and press enter to run it.
-
bootrec.exe /rebuildbcd
-
bootrec.exe /fixmbr
-
bootrec.exe /fixboot
4.you can also to run additional chkdsk commands. You should keep idea about drive letters for all your hard drive partitions to use this command.
Enter the following in command Prompt.
-
chkdsk /r c:
-
chkdsk /r d:


